Orinj version 9.0.0
Each track in the session view is equipped with a track control panel. This panel is to the left of the track.
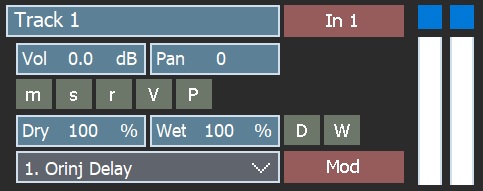
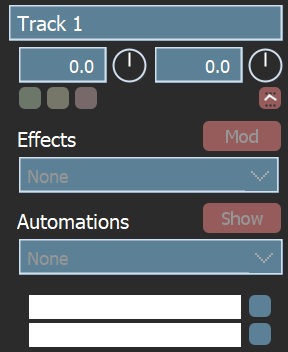
When expanded, the track control panel shows additional controls.
Track title
The track title is at the top (e.g., "Track 1" in the picture above). To change the track title, type a new one here.
The track titles help you to organize your session. Recorded waves in each track will carry the title of the track. For example, if you name a track "Bass" and you record a wave in this track, the wave will be called "Bass_1.wav" or "Bass_2.wav" and so on depending on how many wave files you have already recorded in this track.
Volume controls
The volume controls – the box and the knob –change the volume of the track. You can type a new volume, drag the knob up or down, or use the up and down arrow keys on the box or on the knob.
You can also click on Track and then on Volume in the Orinj menu. You will see the following dialog.
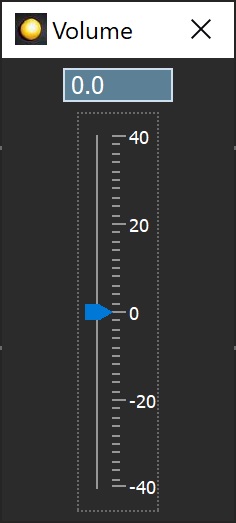
Change the volume in the dialog and close the dialog or press ENTER in it when you are done.
The volume of tracks in the session can be between -40 dB and 40 dB.
Pan controls
Use the pan controls – the box and the knob – to change the pan of the track. You can type a new pan, drag the knob up or down, or use the up and down arrow keys on the box or on the knob.
You can also click on Track and then on Pan in the Orinj menu. You will see the following dialog.
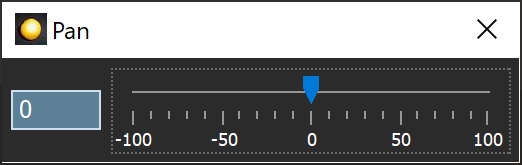
Change the pan and close the dialog or press ENTER when done.
A negative pan means panning to the left. A positive pan means panning to the right. A pan of -100 is left channel only and a pan of +100 is right channel only.
Panning in Orinj is linear. A pan of positive 25 means that a gain in the right channel of 1.25 (4.5 dB) and a gain in the left channel of 0.75 (-5.75 dB).
All sound processing in Orinj is stereo. Mono sound is converted to stereo sound during mixing and playback and you can use panning on mono tracks as well.
Mute button
Use the mute button to mute a track. The track will not be heard when the session is played.
Click on the same button to unmute a muted track.
You can also click on Track and then on Mute in the menu to mute the current track.
Solo button
Use the solo button to solo a track. All other tracks will be muted and will not be heard during playback, unless soloed as well.
Click on the same button to remove the soloing of a track.
You can also click on Track and then on Solo in the menu to solo the current track.
Record button
Use the record button to select the track for recording. If you then start recording, the sound data will be recorded in this track.
You can select more than one track for recording. This is useful if you have more than one input and you want to send different inputs to different tracks.
Click on the same button after recording if you do not want to use this track for further recording.
You can also click on Track and then on Record in the menu to select the current track for recording.
Expand button
Click on the expand button to expand the track or collapse it.
Effects combo box
Expand the track to see the effects combo box.
All effects added to the track will be shown in this box. Use this box to select an effect to view or modify.
Effect Modify button
Expand the track to see the Modify button.
Click on the Modify button to see the parameters of the current effect in the effect combo box. You will see a dialog with the effect controls. You can change these controls, including during playback.
Automations combo box
Expand the track to see the automations combo box.
All automations that are active for this track – volume, pan, and effect controls – are shown in this box. Use the box to select an automation.
You can add or remove automations by right-clicking on a control. To add or remove a volume automation, for example, right click on the volume box or the volume knob.
Automations Show button
Expand the track to see the Show button.
Click on the Show button to show the current automation. When the automation is visible, you can change it by adding, removing, and dragging points.
When the current automation is visible, the Show button will be renamed to Hide. Click on the Hide button to hide the automation.
VU meter

The VU meter shows the volume amplitudes during playback and recording for the left channel (top) and the right channel (bottom).
The buttons to the right will light up if the track clips. Click on those buttons to return them back to normal.
Add new comment