Orinj version 9.0.0
In the Orinj multitrack session, wave files, MIDI files, and loops will appear as blocks inside a track, such as the one in the picture below.

This block displays the actual wave data, with peaks and troughs that align with the time in the Orinj time line. The block may display the full wave or, if you cut out portions of the wave, only a portion of the wave.
Loops and MIDI files are treated similarly to wave files. They are mixed to wave files temporarily. In that way, you can take advantage of Orinj effects, which are designed to work on the sampled audio data in wave files.
Record wave files
For information on how to record waves, see Orinj Working with sessions or Orinj Working with session tracks.
You can record MIDI files similarly. Choose a MIDI input device instead of a sampled audio input device and Orinj will record MIDI data into a MIDI file.
Loop files cannot be recorded. They are built in the Orinj loop building view.
Insert wave files, MIDI files, or loop files
First, select the track in which you want to insert the file by clicking on that track. Click where you want your file to be inserted. Files are always inserted at the position of the play cursor (the vertical yellow line).
To insert the file, click on Track and then on Insert From File in the Orinj menu. Browse to the file you want to insert and open it.
A wave file inserted into your session must have the same sampling rate as the session. The bit resolution can differ. If Orinj encounters a file that has a different sampling rate, it will attempt to convert it. Orinj will create a new file with the proper audio format and will insert that file instead. The original file will not be changed.
Loop and MIDI files are mixed temporarily to wave files with the same sampling rate and sampling resolution as the session.
If you insert an AIF file, AU file, or a non-PCM wave file (such as A-law and U-law compressed wave files), Orinj will attempt to convert this file to a PCM file. A new file will be created, and the original file will not be changed.
Mute blocks
To mute a wave, MIDI, or loop block, click on the block to select it and then click on Block and then on Mute in the Orinj menu. You can also right-click on the block and select Block Mute in the popup menu.
To unmute the block, repeat these steps.
If you want to mute the whole track, see Orinj Working with session tracks.
Fade the ends of blocks
If you cut portions of wave or loop blocks, you may end up cutting the audio data at a place where the audio signal wave is not zero. When playing the resulting block, the signal will jump from zero to some other value or from some nonzero value to zero, which may create audible pops and clicks in the playback. To remove these pops and clicks, you can fade the ends of blocks.
To fade the ends of a block, click on that block to select it and then click on Block and then on Fade Ends in the Orinj menu. You can also right-click on the block and select Block Fade Ends. After you do so, during playback, Orinj will gradually increase the amplitude of the signal at the beginning of the block and gradually decrease the amplitude of the signal at the end of the block.
The gradual fading at the ends of blocks is short – e.g., 10 milliseconds – and will not be audible, but will be sufficient to eliminate pops and clicks.
Replace the audio data in blocks
Each block uses an audio file on your hard drive – wave file, MIDI file, or loop file. To see which audio file is used by a block, click the corresponding block to select it and then click on Block and then on File in the Orinj menu. You will see the following dialog.

To change the audio file used by the block, click on the Replace button in the dialog. Then browse to the new file and open it.
Move blocks
Click on the move pointer button ( ) in the pointer toolbar at the bottom of Orinj. Then click on the block and drag it to where you want the block to be. You can drag it both to the left or right in the same track or you can drag it to another track.
When you move the block, it will "snap" at certain places in your session. The snap places could be the beginning of measures in your progression (depending on how you set up the tempo and time signature of your session) or the beginning and end of other blocks. Snapping is there to ensure that the block that you are dragging aligns precisely with the snap places. If, for example, you want to align the block with the beginning of another block, you only need to drag it close enough to that place and release it when you see the vertical red snap line. Orinj will assume that you are attempting to align the two blocks and will place the moved block accordingly. If snapping was not available, you would have to zoom into your session and align the blocks manually. You may in fact have to zoom in very far as even small differences could be audible. If you do not want blocks to snap, you can change the Orinj snap options (see Orinj Preferences).
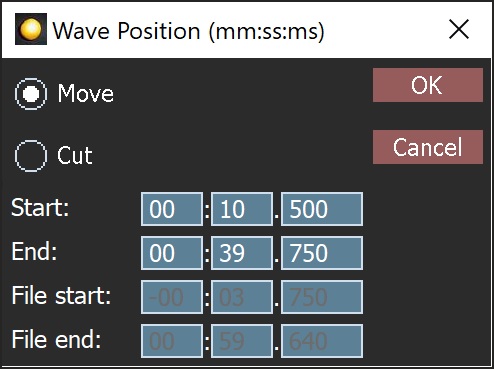
You can also move wave, loop, and MIDI blocks with the Position command in the Orinj menu. Select the block that you want to move by clicking on it. Then click on Block and then on Position. You will see the following dialog.

This dialog shows the current position of the block in time in the format minutes:seconds:miliseconds. To move the block, make sure Move is selected in the top left, enter a new start or end time and click OK. If you enter a new start time, the end time will adjust accordingly to reflect the length of the block. If you enter a new end time, the start time will adjust.
If you select Cut instead of Move in the dialog, you will be able to cut the start and end of the block without moving it. If the block was already cut at the start or end, you can extend the block and bring back some of the cut portions.
Remove, cut, and destroy blocks
To remove a wave, loop, or MIDI block from your session, select it by clicking on it. You will see that the block is selected, as it will become lighter in color. Then click on Block and then on Remove in the Orinj menu. You can also right-click on the block and choose Block Remove. The block will be removed from the session, but the corresponding file will remain on your hard drive.
To cut out a portion of a wave, loop, or MIDI block, select that portion and click on Block and then on Cut in the Orinj menu. When a portion is cut, the underlying wave, loop, or MIDI file residing on your hard drive does not change. Orinj will simply display a portion of that file in the multitrack session, but will not actually remove data from the file.
To select a portion of a block, first click on the select mouse pointer button ( ) in the pointer toolbar at the bottom of Orinj, and then drag the mouse over the block. When you select, the cursor will snap to the time signature line and to other blocks during selection, similarly to the snapping when moving blocks as described above.
To remove a wave, loop, or MIDI block both from your session and from your hard drive (to delete the corresponding file), select the block and click on Block and then on Destroy in the Orinj menu. The block that you "destroy" cannot be restored. This operation cannot be undone. The files that you may want to destroy are ones that you are sure will never be useful, such as a recording take with major mistakes.
Loop blocks
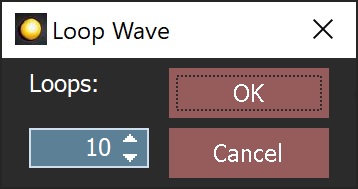
To loop a wave, loop, or MIDI file, click on the corresponding block to select it and then click on Block and then on Loop in the Orinj menu. You will see the following dialog.

Select the number of times the block should be looped and click OK. The block will be repeated so that each next block will start from the end of the previous one.
All looped blocks will use the same audio file on your hard drive. If you change the underlying file – if, for example, you change the loop in the loop building view – all looped blocks will change at the same time. You can make individual blocks unique (pointing to a unique file) as described below.
Make blocks unique
When looping a wave, loop, or MIDI block as above, all resulting loop blocks will point to the same file on your hard drive. Similarly, if you insert a wave, loop, or MIDI file twice or more times into your session, there will be several blocks that point to the same file on your hard drive.
If you want to make one of the blocks independent of the others and pointing to a separate file, select the block and click on Block and then on Make Unique in the Orinj menu. A separate file will be created on your hard drive and the selected block will now point to this new file.
Examine the meta properties of blocks
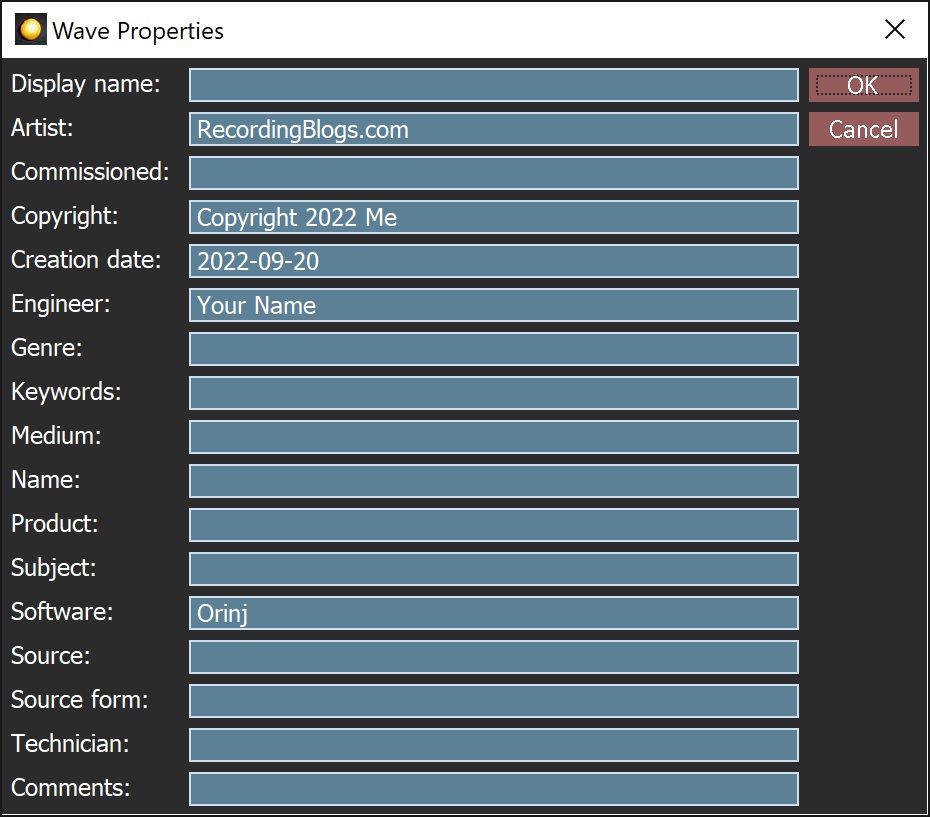
Click on the block to select it. Then click on Block and then on Meta Properties in the Orinj menu. You will see a dialog that displays the meta properties of the block. Orinj handles the meta properties of different blocks – wave, loop, or MIDI – differently and what you see will depend on the type of block.
The following dialog is the one that will be shown for wave blocks.

In the multitrack session, you cannot change the meta properties of blocks. You can only view them.
Display single waves, loops, and MIDI blocks
To open a wave in the Orinj single wave view, double-click on the wave block or click on it once to select it and then click on Block and then on View Single in the Orinj menu.
To open a MIDI file in the Orinj MIDI roll view, double-click on the MIDI block or click on it once to select it and then click on Block and then on View Single in the Orinj menu.
To open a loop file in the Orinj loop building view, double-click on the loop block or click on it once to select it and then click on Block and then on View Single in the Orinj menu.
Add new comment