Orinj version 9.0.0
An auxiliary channel in Orinj is a group of tracks with its own volume, pan, and effects. During playback and mixing, Orinj:
- Applies volume, pan, and effects to each track.
- Combines all tracks into the auxiliary channels.
- Applies volume, pan, and effects to the auxiliary channel.
- Sends the result to the overall mix.
Auxiliary channels are created by the user. There can be several or no auxiliary channels in a session.
In the Orinj session view, auxiliary channels show up as tracks. They have the same controls as other tracks. The differences are:
- You cannot record to an auxiliary channel. The input to an auxiliary channel is other tracks.
- You cannot set the input device for an auxiliary channel.
The master channel is the overall mix. During playback and mixing, Orinj:
- Combines all tracks and auxiliary channels into a single signal.
- Applies the volume, pan, and effects of the master channel to that signal.
- Sends the signal for playback or places it in the overall mix.
Each session always has one and only one master channel.
Add an auxiliary channel
In the session view menu, click on Session, Tracks, and then on Add Aux Channel. A new aux channel will be created above the track that is currently selected. No tracks will be sent or copied to that auxiliary channel until you choose to do so.
Remove an auxiliary channel
Click on the channel to make that channel the selected track. In the menu, click on Session, Tracks, and then on Remove. Removing an auxiliary channel does not change the tracks that were sent or copied to that auxiliary channel and no sound data is lost.
Send or copy tracks to an auxiliary channel
In the session view menu:
- Click on Session, Tracks, and then on Aux Channel Tracks. You will see the following dialog.

- All tracks that are sent or copied to the auxiliary channel will be shown on the right. Tracks that were sent or copied to the auxiliary channel will appear on the left.
- Click on the Send button to send a track to the auxiliary channel. When you send a track, all track output, after any effects, volume, pan, and other controls, is sent to the auxiliary channel, but not to the master channel.
- Click on the Copy button to copy a track to the auxiliary channel. When a track is copied, it is sent both to the auxiliary channel – after any effects, volume, pan, and other controls – and to the master channel, again, after any effects, volume, pan and other controls.
- If you want to remove a track from the auxiliary channel, select that track on the left and click on the Remove button.
A track can be sent to more than one auxiliary channel. A track can also be copied to more than one auxiliary channel. A track can also be sent to one auxiliary channel and copied to another at the same time.
Change the controls of an auxiliary channel
Auxiliary channels have the same controls as tracks. You can change the effects, volume, pan, and automations for an auxiliary channel the same way you change the effects, volume, pan, and envelopes of any other track. See Working with session tracks.
Change the controls of the master channel
Click on Track and then on Master Channel. You will see the following dialog.
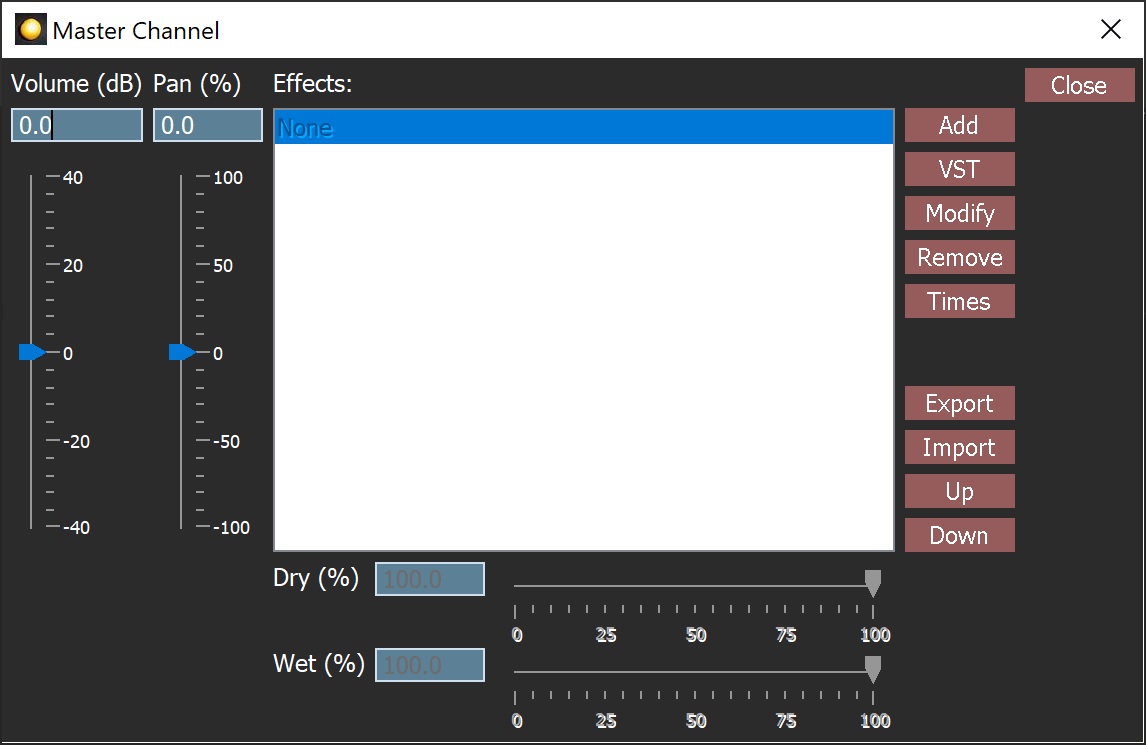
Change the volume, pan, and effects of the master channel and close the dialog, when you are done. You can change master channel controls during playback and work with these controls and the session at the same time.
- Use the volume controls – the box and the slider – to adjust the overall volume of the mix. The volume is measured in decibels and can be between -40 dB and 40 dB.
- Use the pan controls – the box and the slider – to adjust the overall pan of the mix. The pan is measured in percent and can be between -100 precent (far left) and 100 percent (far right).
- Click on the Add button to add an Orinj stock effect to the overall mix. You will see a list of the available effects. Choose one and click OK to see the controls for that effect.
- Click on the VST button to add one of the available VST effects (see Orinj VST support).
- Click on the Modify button to change the effect that is selected. You will see a dialog with the controls for that effect.
- Click on the Remove button to remove the selected effect.
- Click on the Times button to change the start and end times in the session for when the selected effect will be used.
- Click on the Export button to export the list of effects in an effect stack. An effect stack is a file that can then be imported elsewhere (e.g., in another session or in a track). See Orinj Working with session tracks for more information.
- Click on the Import button to import an effect stack.
- Click on the Up button to move the selected effect up in the order of effects.
- Click on the Down button to move the selected effect down in the order of effects.
- Click on the Close button to close the master channel dialog.
Auxiliary channels and the master channel in the mix
See Orinj Mix order.
Add new comment