Orinj version 9.0.0
In this part of the tutorial, you will open a drum loop. In the next part of this tutorial, this loop will be used to create a drum track. The drum track will also serve as your metronome or "click track" when recording.
You will not record in this part of the tutorial. Recording is described in Part 4.
Download this example loop file
- Download the following file. Place it next to the session you saved in the previous part of this tutorial, in the same folder.
| blues simple 01.klp | July 17, 2025 | A simple drum loop file for a blues song (7 KB). |
Explanation: This is an example drum loop file created with Orinj. You can create your own loop files, but, for this tutorial, you will start with a ready one.
Switch to the loop view of Orinj
- Click on the loop view button (
 ) in the view toolbar at the bottom of Orinj.
Explanation: The Orinj loop view is where you can build loops from short wave files (single shots).
Open the drum loop
- Click on File and then on Open in the menu at the top of Orinj.
- Browse to the folder with your session and loop.
- Double-click on the "blues simple 01.klp" file to open it. You should see hits added to the first few tracks of the loop view.
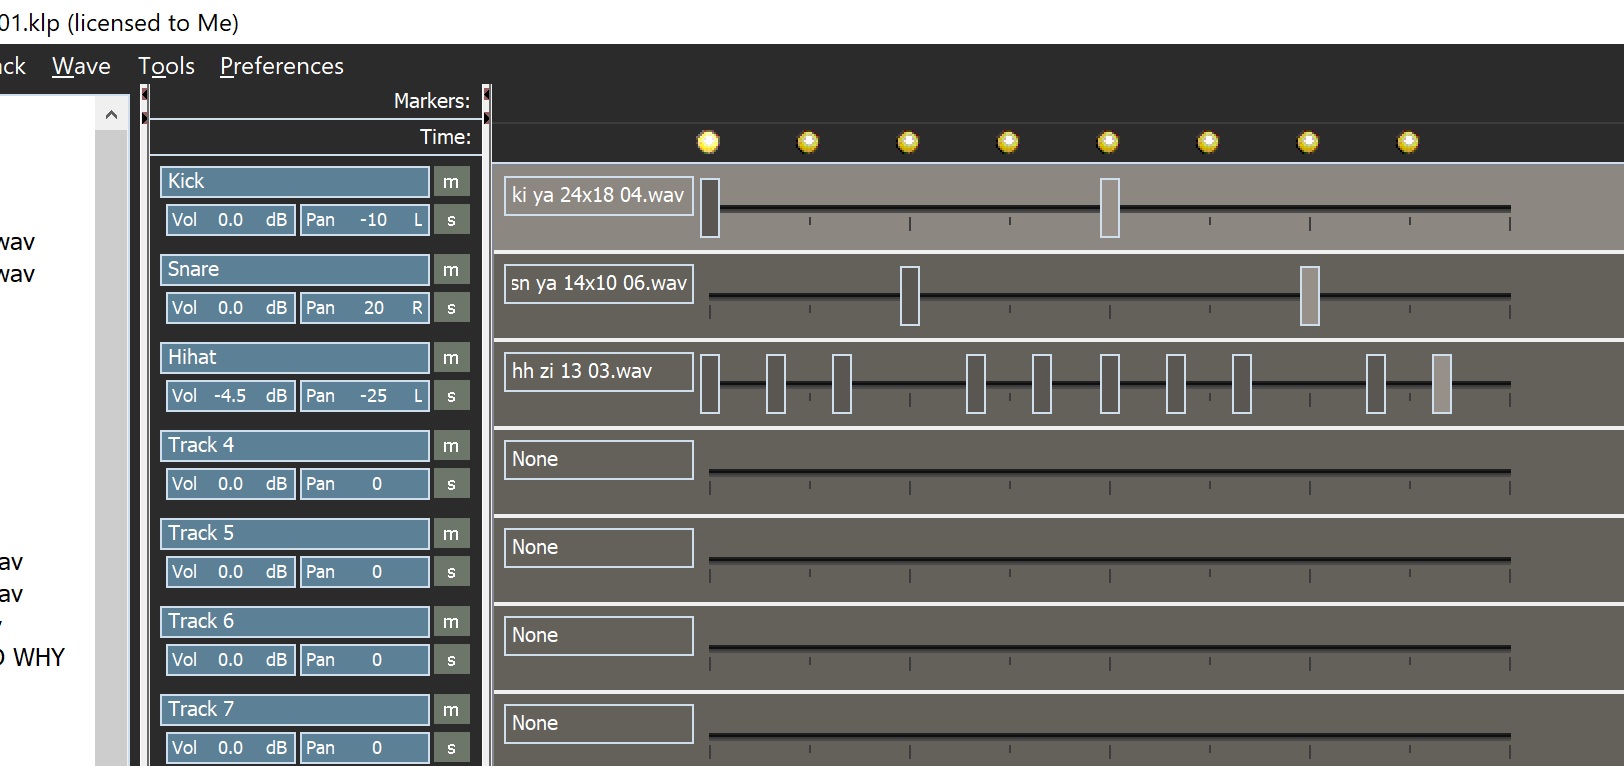
tracks with samples. The rest of the tracks are empty.
The first track uses the wave sample "ki ya 24x18 04.wav". This is one of the samples distributed with Orinj. It is a Yamaha 24x18 inch kick drum (see Orinj Installation files). In the loop, the kick is hit twice, once at the beginning and once in the middle.
The second track is the Yamaha 14x10 inch snare. The snare also happens twice in the loop, on beats two and four of the four-beat loop (the kick is on one and three).
The third track is the Zildjan 13-inch high hat. It plays ten times in the loop.
You opened one of the loops distributed with the Orinj installation. This is an example loop. For your songs, you can create your own loops.
Hear the loop
- Click on the Play Loop button (
 ) in the player toolbar at the bottom of Orinj.
 - When you are done listening to the playback, click on the Stop button (
 ) in the player toolbar at the bottom of Orinj.
Explanation: If you need to select an output device (soundcard), click on Loop and then on Output Device in the menu.
Check the tempo and rhythm of the loop
- Click on Loop and then on Tempo / Time Signature in the menu.
- Review the Tempo / Time Signature settings for this loop.
- Click on Cancel.
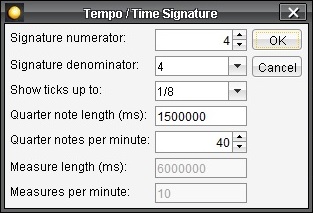
Explanation: This is a 4/4 loop, with ticks shown for every 8th note. The tempo is 40 quarter notes per minute (quite slow) with each quarter note equal to 1.5 seconds (1500000 microseconds). The total length of the loop is 6 seconds (6000000 microseconds). 10 loops fit into one minute.
This is where you can speed up or slow down your loop. You should not do so for this tutorial though, as the session that you will create later in this tutorial depends on this tempo.
Change this loop
Here are some things you can do.
- Double-click on one of the hits (for example, the second kick). The hit will disappear.
- Double-click anywhere on one of the tracks with instruments (but not on one of the hits) to see a new hit appear.
- Drag one of the hits left or right. Notice how it snaps to the tick marks.
- Expand the tree to the left, choose another instrument and drag it to the fourth track. You can now add hits to that track too.
Explanation: These are the usual things you will do when creating loops, including when starting with a blank loop with no instruments or hits.
If you made any changes to this loop and you want to save those changes, save it.
- Click on File and then on Save.
See also
This completes the second part of the Orinj tutorial – building a drum loop. The remaining parts of this tutorial are as follows.
Orinj Getting started - Part 1 - Set basic Orinj preferences and prepare your session
Orinj Getting started - Part 3 - Create drum and bass tracks
Orinj Getting started - Part 4 - Record guitar and vocals
Orinj Getting started - Part 5 - Mix your song
Add new comment